Popup Visibility
Configure visibility rules for Elementor popups using display settings, conditionals, contact tags, and contact field values.
Display Settings
Section titled “Display Settings”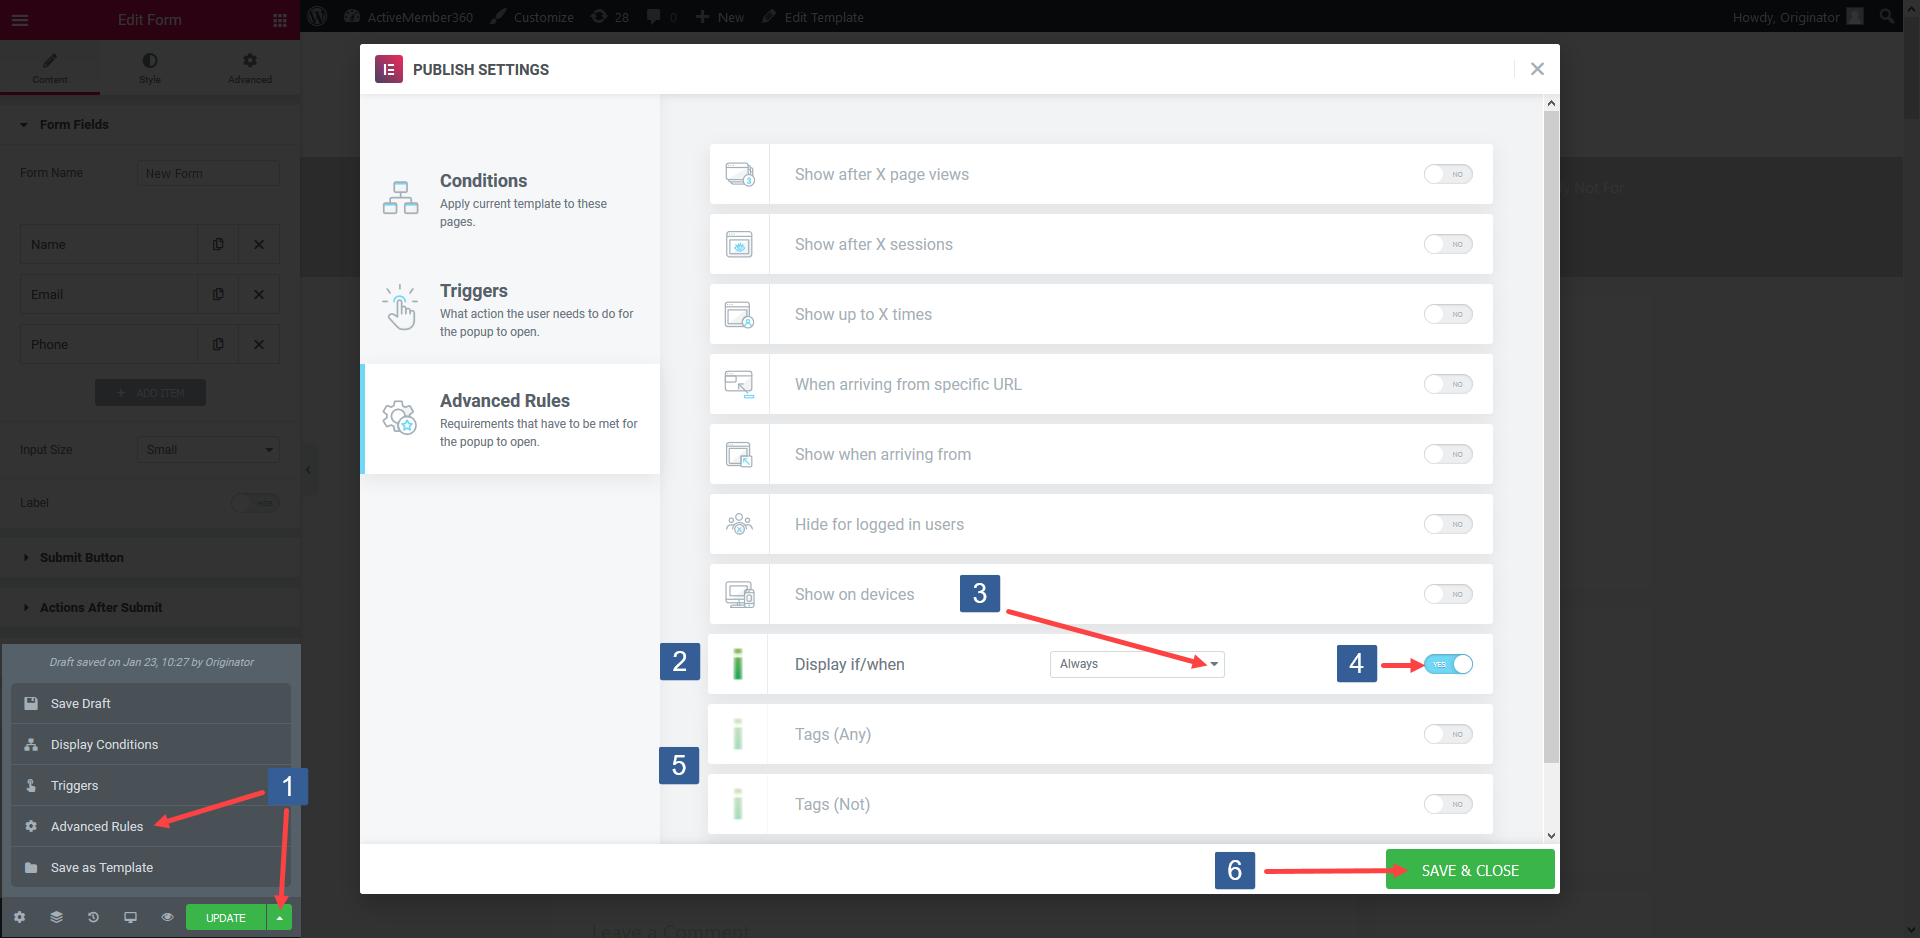
-
When editing/creating the popup within the Elementor editor expand Save Options and select Advanced Rules.
-
Locate the iMember360 Display/if when rule.
-
The default iMember360 display rule is to Always display the selected popup.
The other display rule options are Is Logged In, Not Logged In and Never.
In the drop down select the required display rule.
-
Turn the rule on or off as desired.
-
Once the rule settings have been completed ensure SAVE & CLOSE is clicked to save the publish settings configuration.
iMember360 Conditional
Section titled “iMember360 Conditional”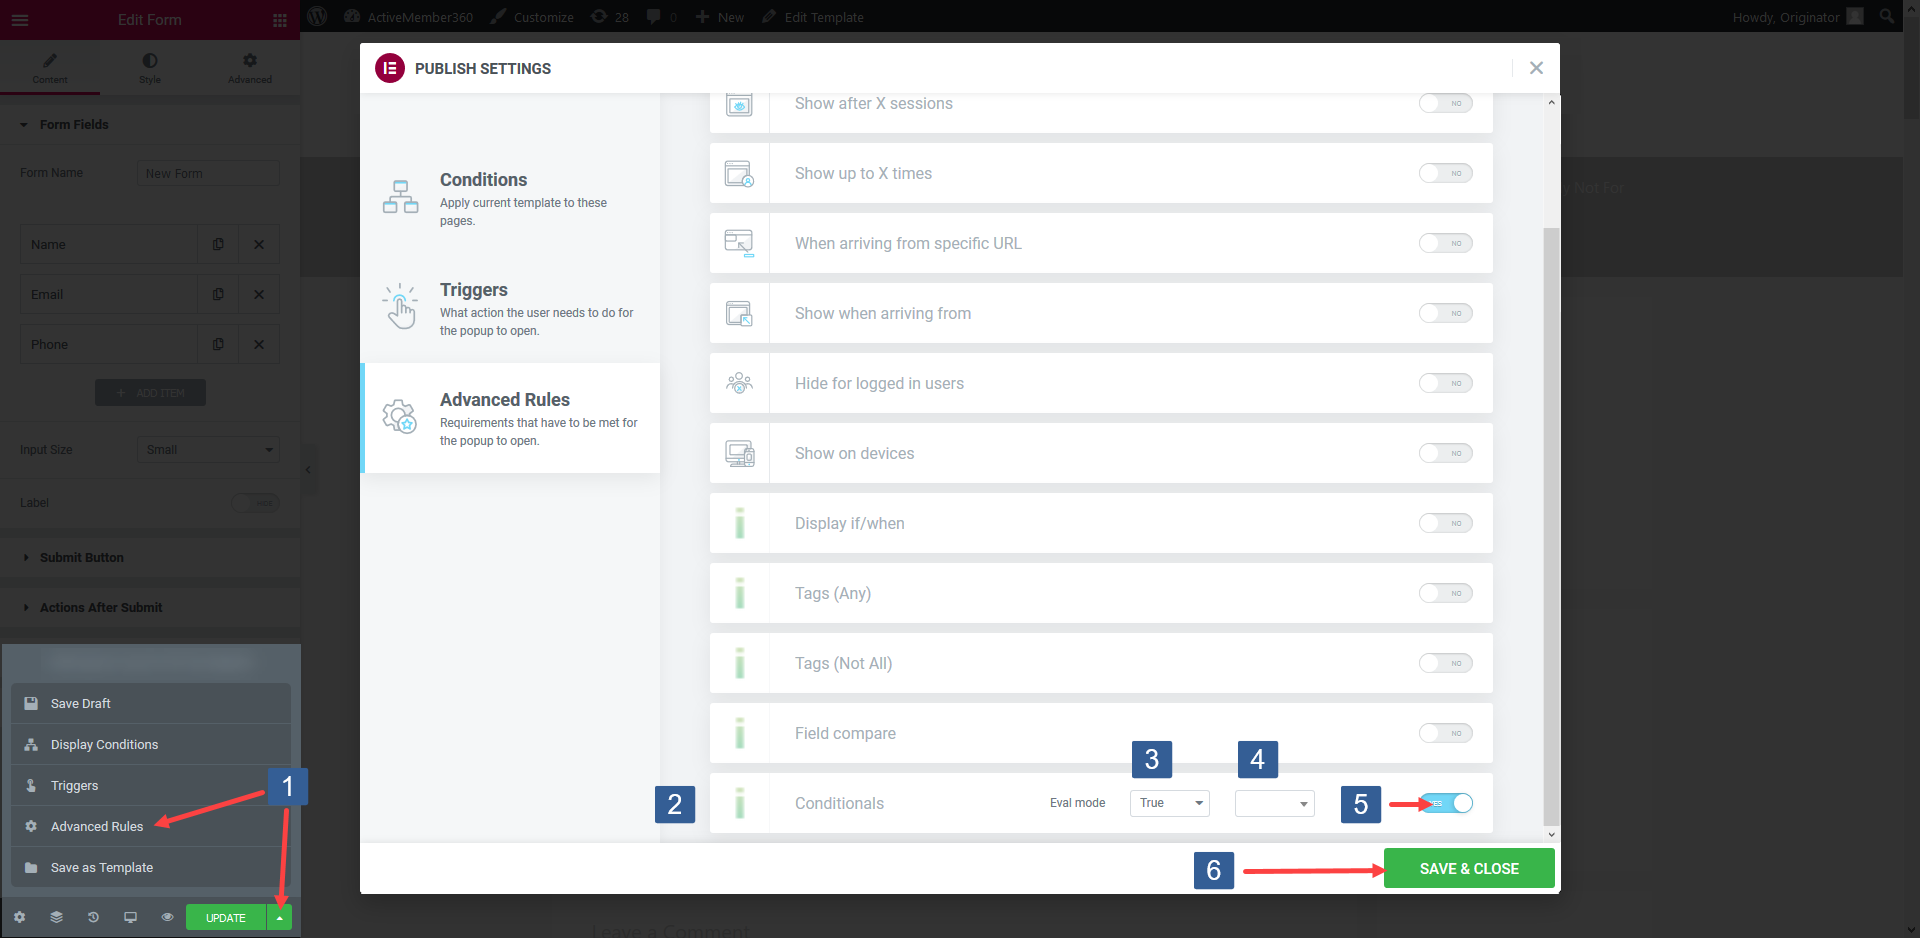
-
When editing/creating the popup within the Elementor editor expand Save Options and select Advanced Rules.
-
Locate the iMember360 Conditionals rule.
-
From the Evaluation mode drop down select whether the conditional needs to evaluate as True or False to be considered as a TRUE condition to display the popup.
-
From the Conditional drop down select the required conditional to be evaluated.
Active conditionals are shown in the drop down with the suffix of (publish).
-
Turn the rule on or off as desired.
-
Once the rule settings have been completed ensure SAVE & CLOSE is clicked to save the publish settings configuration.
Tags (Any)
Section titled “Tags (Any)”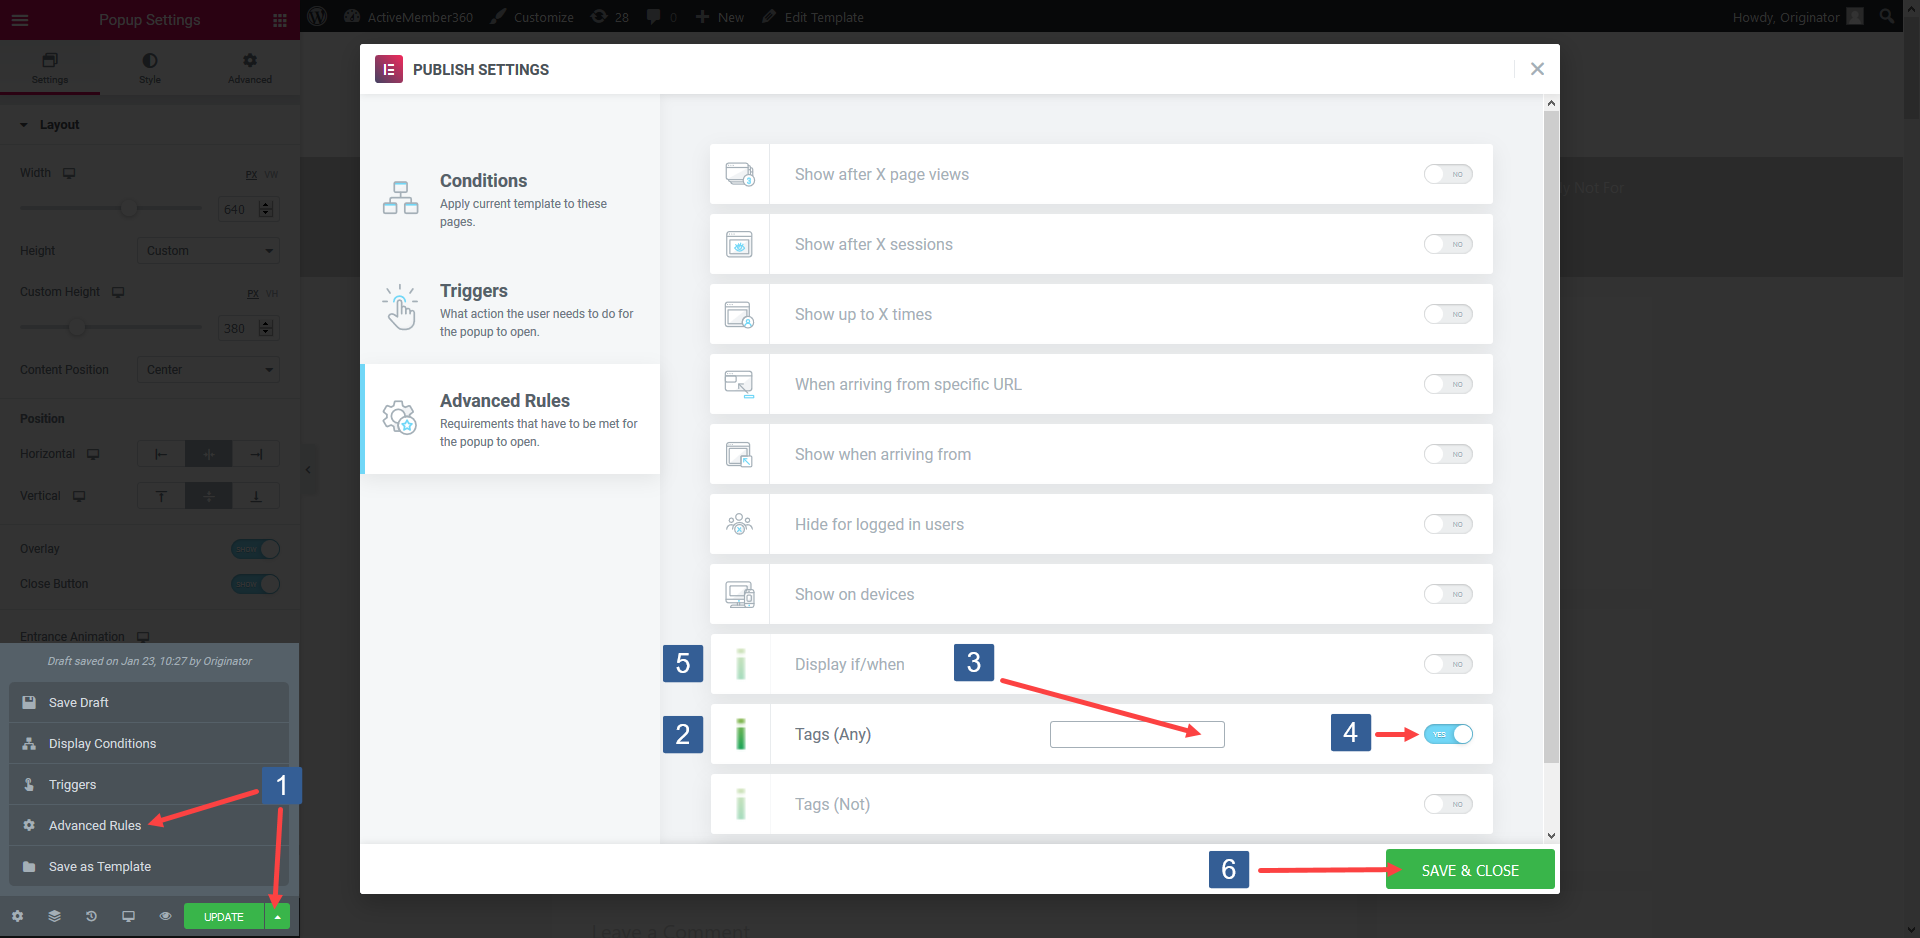
-
When editing/creating the popup within the Elementor editor expand Save Options and select Advanced Rules.
-
Locate the iMember360 Tags (Any) rule.
-
In the Tags (Any) dropdown select the Keap tag(s) the user should have for this condition to evaluate as TRUE. The user can have any of the tags specified for the condition to evaluate as TRUE.
Click in the selection area and start typing part of the tag name to refine the list. Then click on the required tag.
Multiple tags can be selected.
Individual tags can be removed from the selection by clicking on the x shown next to the individual tag name.
-
Turn the rule on or off as desired.
-
Once the rule settings have been completed ensure SAVE & CLOSE is clicked to save the publish settings configuration.
Tags (Not All)
Section titled “Tags (Not All)”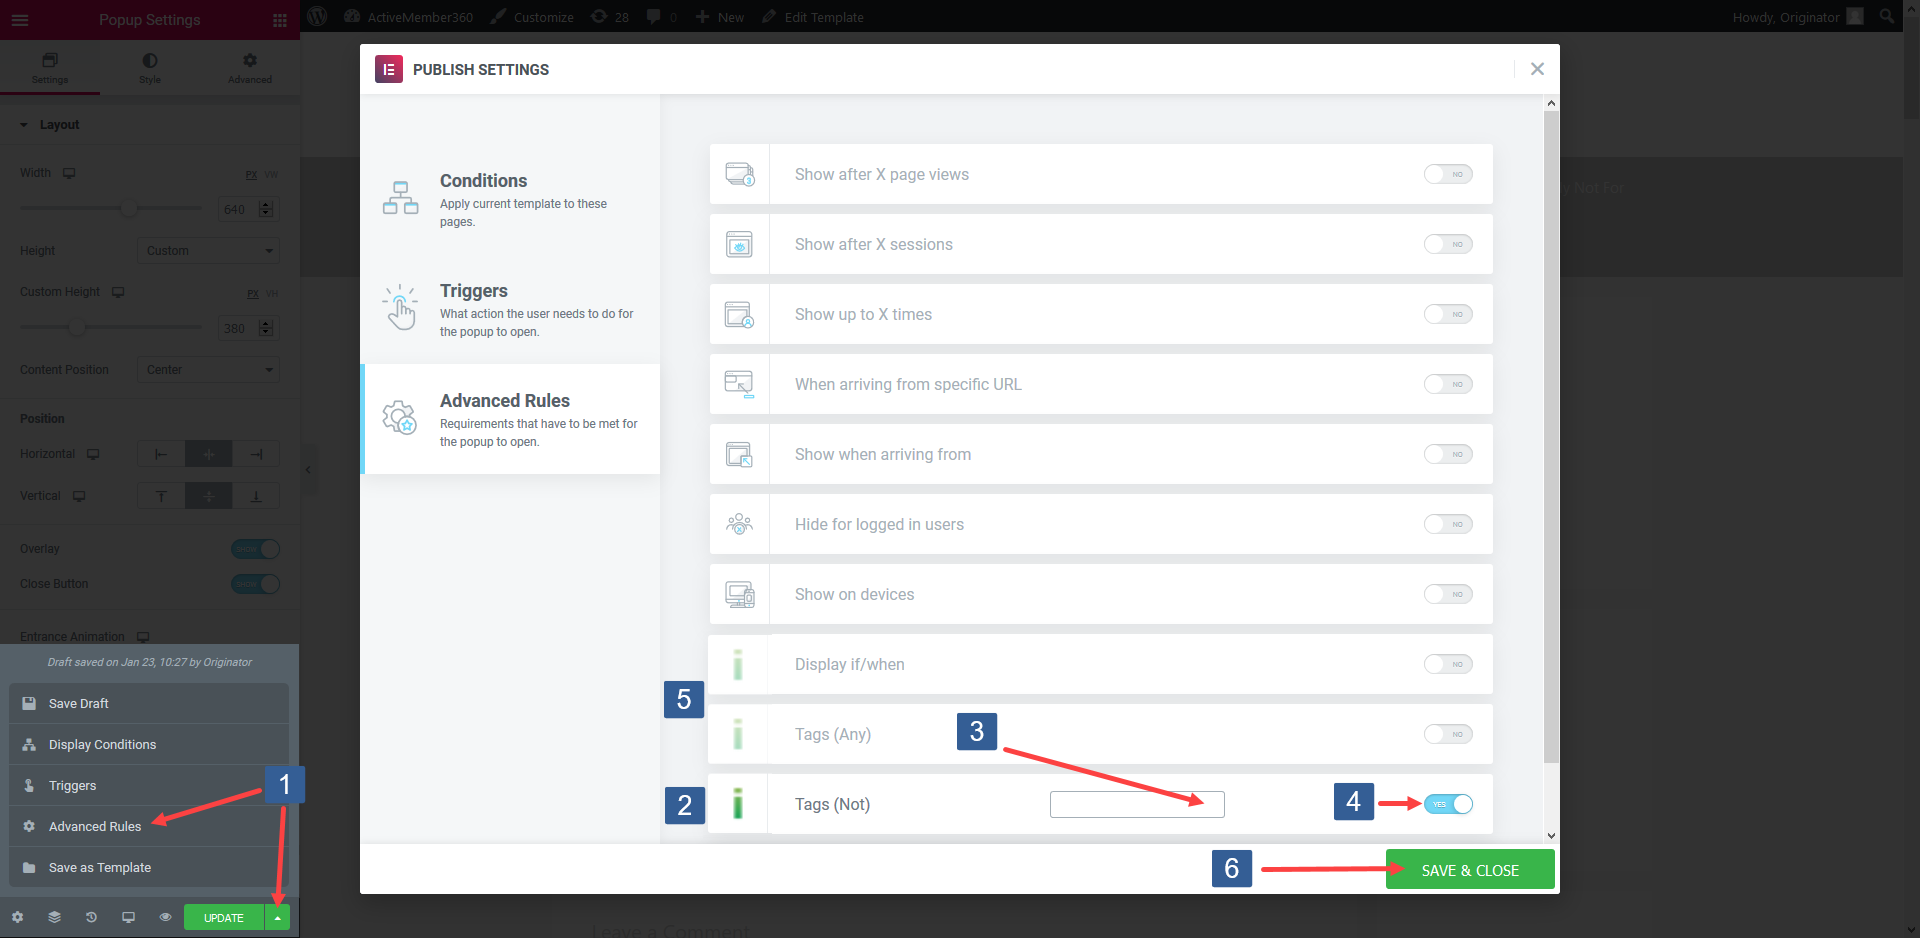
-
When editing/creating the popup within the Elementor editor expand Save Options and select Advanced Rules.
-
Locate the iMember360 Tags (Not All) rule.
-
In the Tags (Not all) dropdown select the Keap tag(s) the user should not have for the condition to evaluate as TRUE. The user must have none (not all) of the tags specified for the condition to evaluate as TRUE.
Click in the selection area and start typing part of the tag name to refine the list. Then click on the required tag.
Multiple tags can be selected.
Individual tags can be removed from the selection by clicking on the x shown next to the individual tag name.
-
Turn the rule on or off as desired.
-
Once the rule settings have been completed ensure SAVE & CLOSE is clicked to save the publish settings configuration.
Contact Field Value
Section titled “Contact Field Value”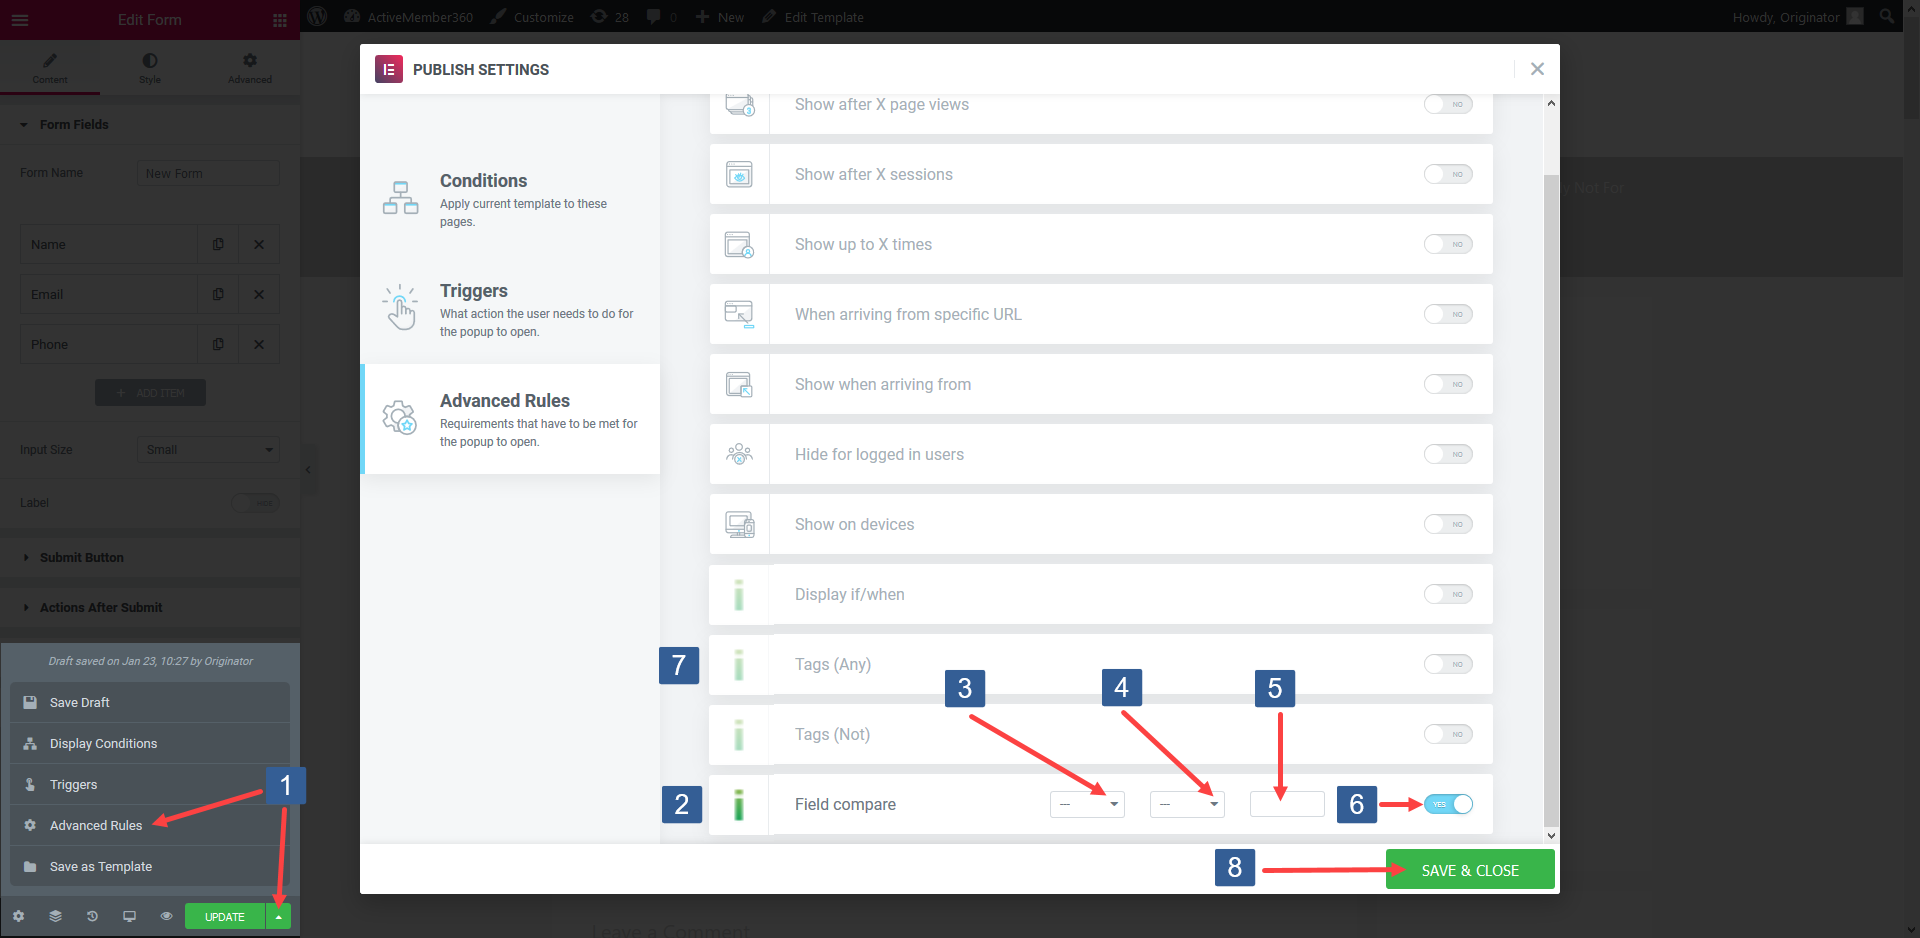
-
When editing/creating the popup within the Elementor editor expand Save Options and select Advanced Rules.
-
Locate the iMember360 Field compare rule.
-
In the drop down select the Keap contact field to be used for the comparison.
Click the drop down then scroll or start typing the first characters of the contact field to aid selection. Click on the required contact field.
-
In the drop down select the comparison operator.
The comparison operators available are:
- — (None)
- Equals
- Not equal
- Greater than
- Less than
- Greater or equal
- Less or equal
- Begins with
- Ends with
- Contains
- Not contains
-
Specify the value to be used for comparison.
When entering a date it should be specified in the format that Keap stores the date i.e. yyyymmdd
-
Turn the rule on or off as desired.
-
Once the rule settings have been completed ensure SAVE & CLOSE is clicked to save the publish settings configuration.